
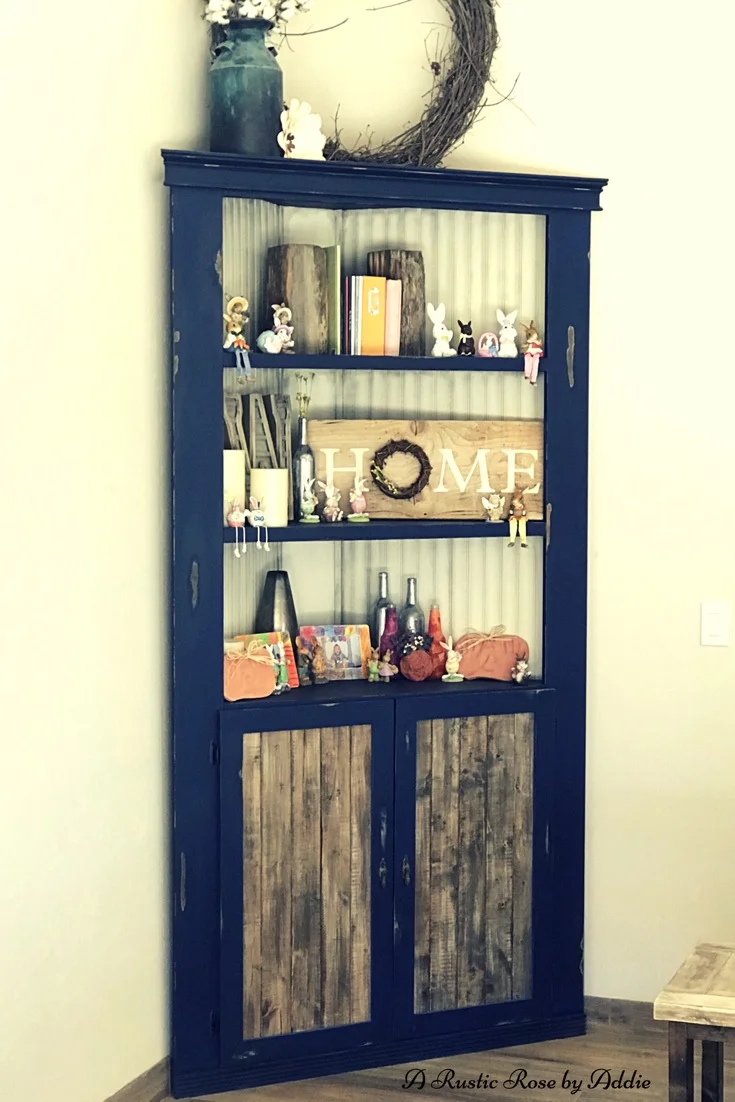
DIY Corner Cabinet Part 1
If you are a fan of ARusticRose and frequent reader of my blogs then you know Pinterest is where I go for inspiration and this project was no different. Before we had even moved into our house I had all ready found plans for a corner cabinet to build for our living room. We don't have room for a traditional entertainment center or a cabinet under the tv but I do like for all of our electronics to be hidden. We have high ceilings in our living room so we thought a larger than normal piece of furniture would help balance out the space. A corner cabinet was the best way to get all of our needs covered. If you have a big corner to fill your welcome to follow our measurements but if you have a smaller corner here is the original plans and measurements that we followed and we expanded to fit our piece.
(Please note that this post contains affiliate links, which means that when you buy any product /services using my link then I’ll earn a small commission at no EXTRA cost to you. Thank You!)
Supplies
- Kreg Jig
- MDF (2 - 4 x 8 x .25 sheets)
- bead board (2 - 4 x 8 sheets)
- 2 - 1 x 6 x 8 (MDF)
- 2 - 1 x 2 x 8 (MDF)
- 1 - 1 x 8 x 8
- 2 - 1 x 3 x 8
- molding
- drill
- clamps
- track saw (optional)
Cutting the Shelves

To cut the shelves I laid a sheet of MDF on the floor, and first ripped the MDF into three pieces, all being 21 inches wide. I thought 6 shelves would work best for this piece so to get all 6 shelves the exact size, I used a 45 degree angle from the back of the shelf, which we chose the back to be 8 inches wide, this left the front measurement to be 49.5 inches across the front. Continue this process until you have the number of shelves you desire. Measure one at a time because the saw blade will take off about an 1/8 of an inch with each cut, doesn't sound like much but by the end of all your cuts your shelves will be a different size.
Assembling Shelves and Back

Now its time to start assembling the shelves and back board. This part is definitely easier with 2 people, my dad was my helper and the second pair of hands on this part of the project. On the 1 x 8 x 8 we mocked up and measured where we wanted the shelves placed. This step is where you can get creative and is up to you for what you are wanting to use the shelves for. Just keep in mind that the top shelf is the top of the cabinet, the bottom shelf is the base, and if your wanting to have base cabinet doors the 3rd shelf up form the bottom is the top shelf where the doors start. Once we had everything measured and drawn out, we predrilled holes in the 1 x 8. We started assembly with the top and bottom shelves and worked our way in, gluing and screwing each shelf to the 1 x 8 with the trim screws. Our MDF board was 1/2 inch thick which worked, but if I do another one I would recommend using 3/4 inch because you have more thickness to play with when attaching the pieces together. Now its time to put on the bead board.
Bead Board Backing
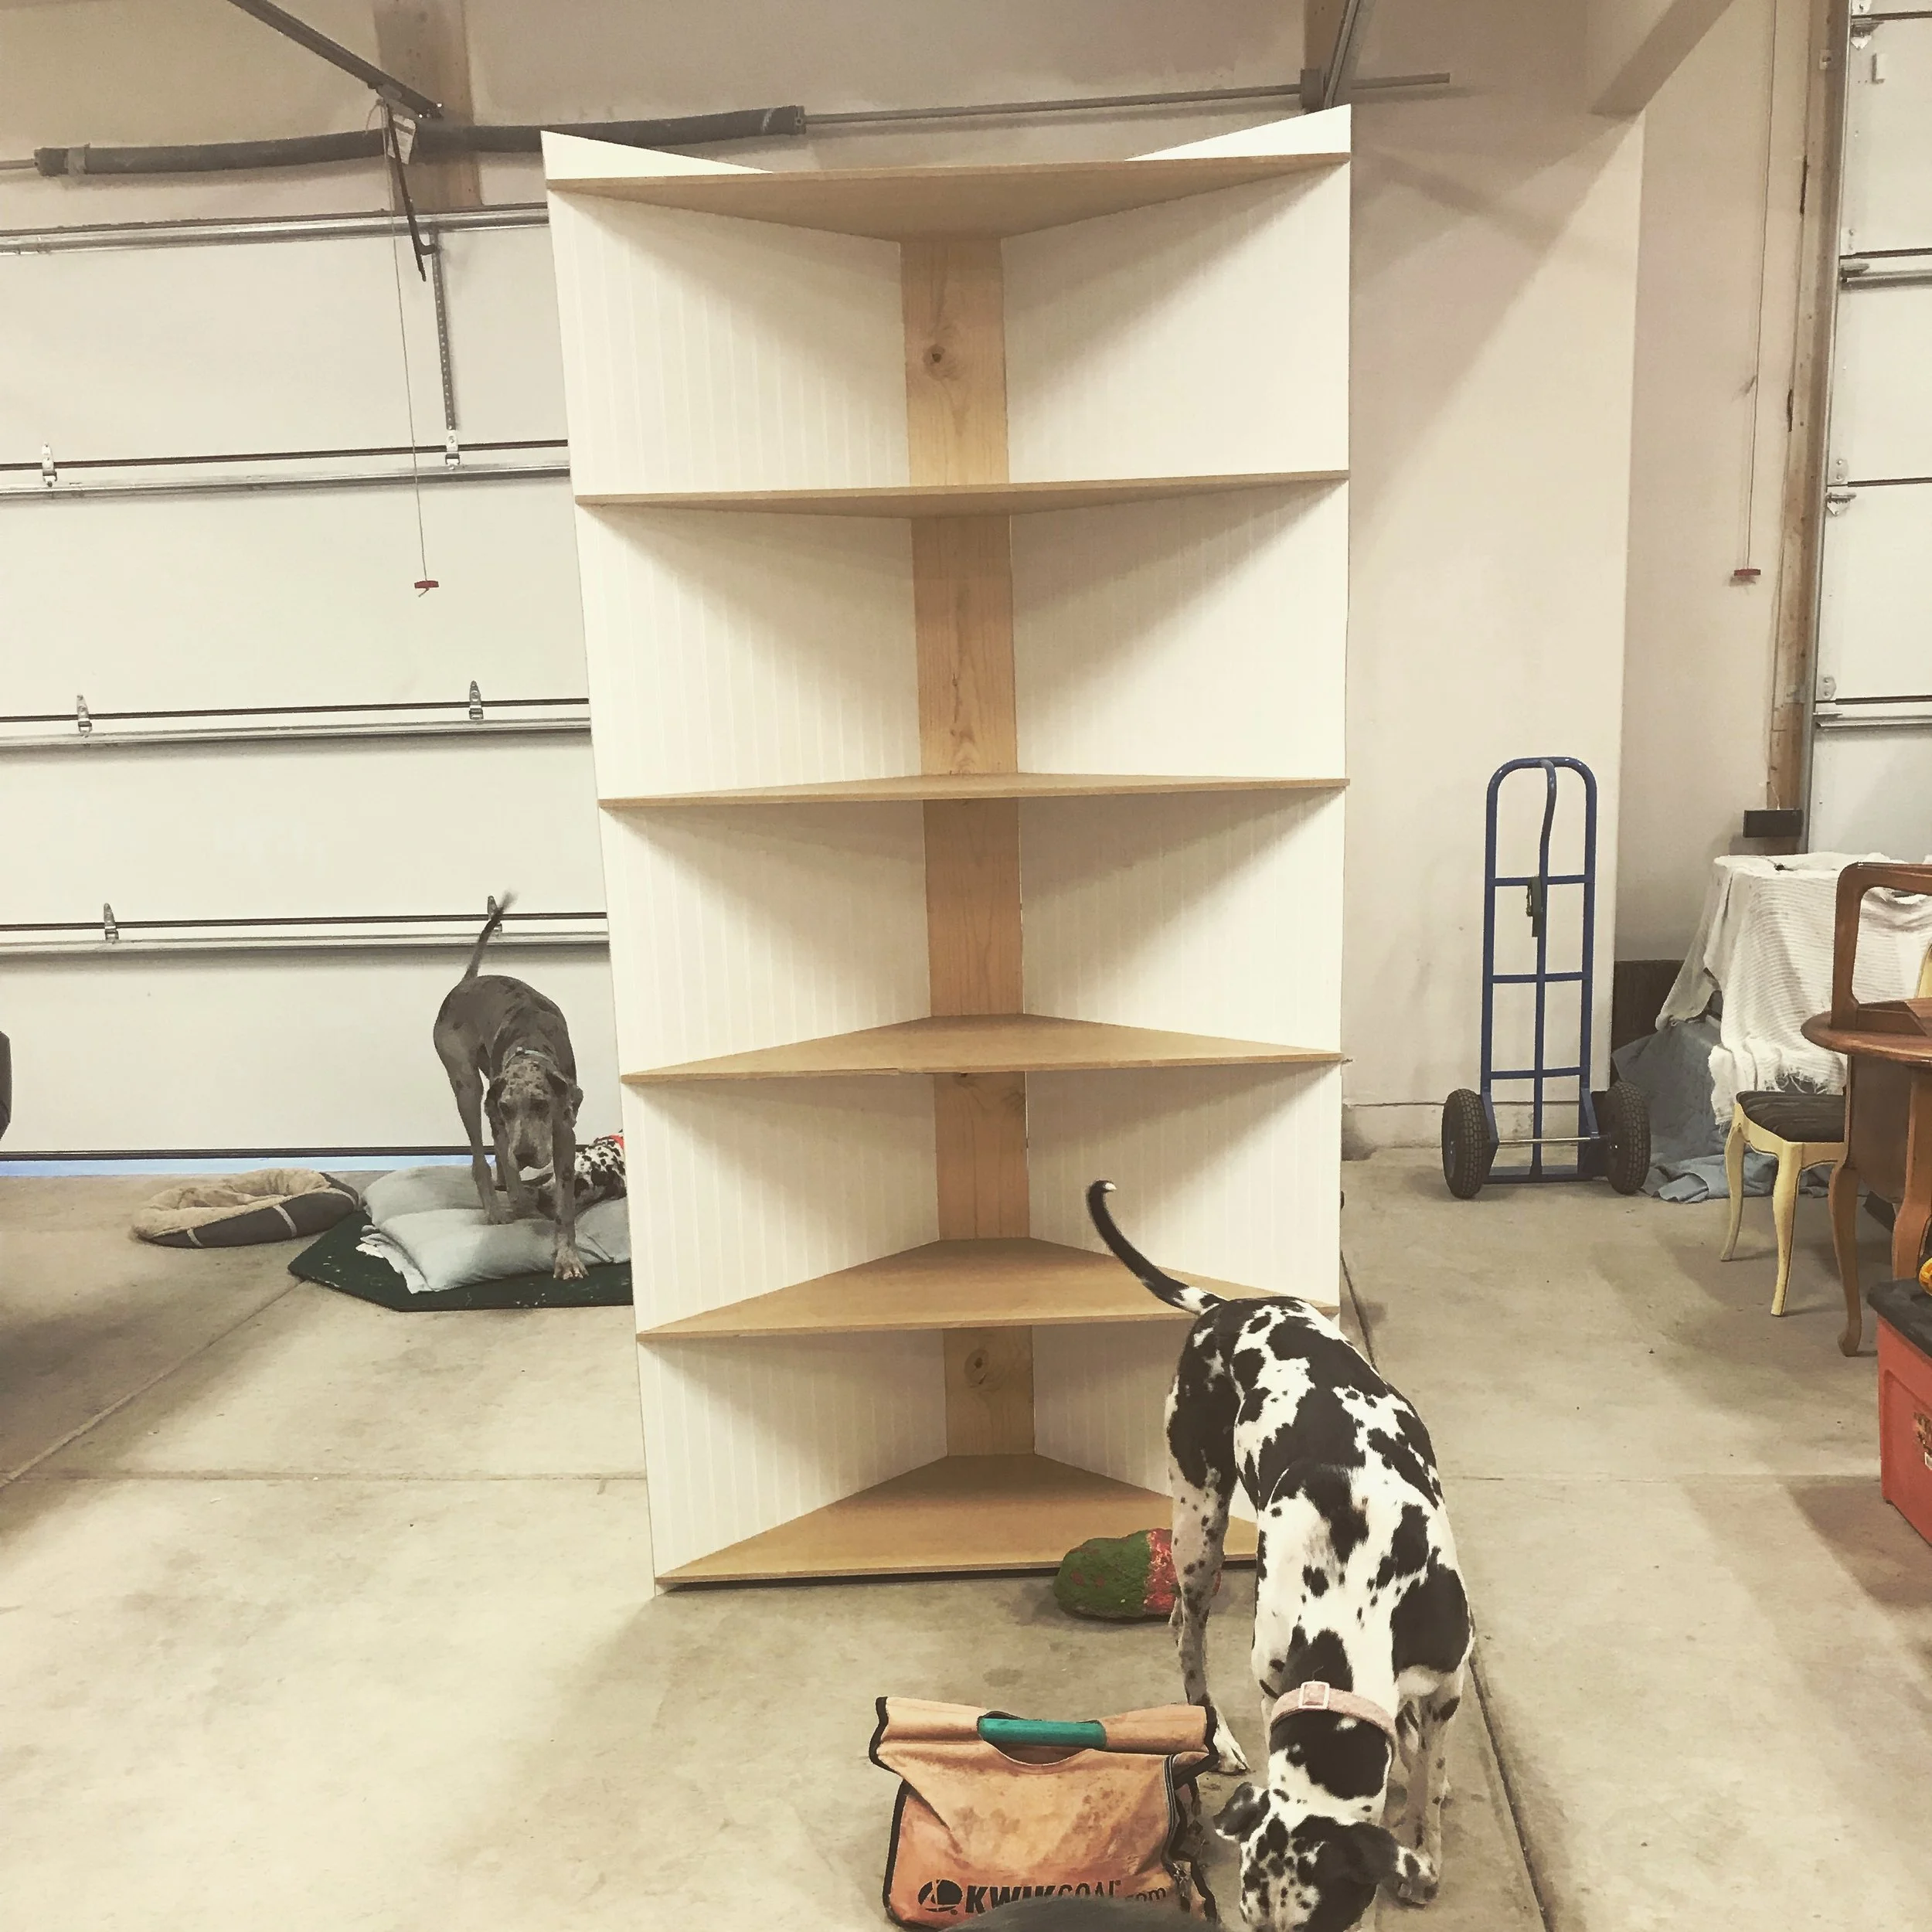
For our cabinet we cut the bead board sheets to 30 inches wide. Make sure to double check that measurement so you don't waste a sheet by cutting it to short. Lay the bead board on top of the shelves so it is even with the the back board. We used tack nails to hold the bead board in place. Do the same thing to the other side with the second piece you cut. When both sides are attached it is then time to put on the front side braces and the front shelf trim pieces.
Front Trim
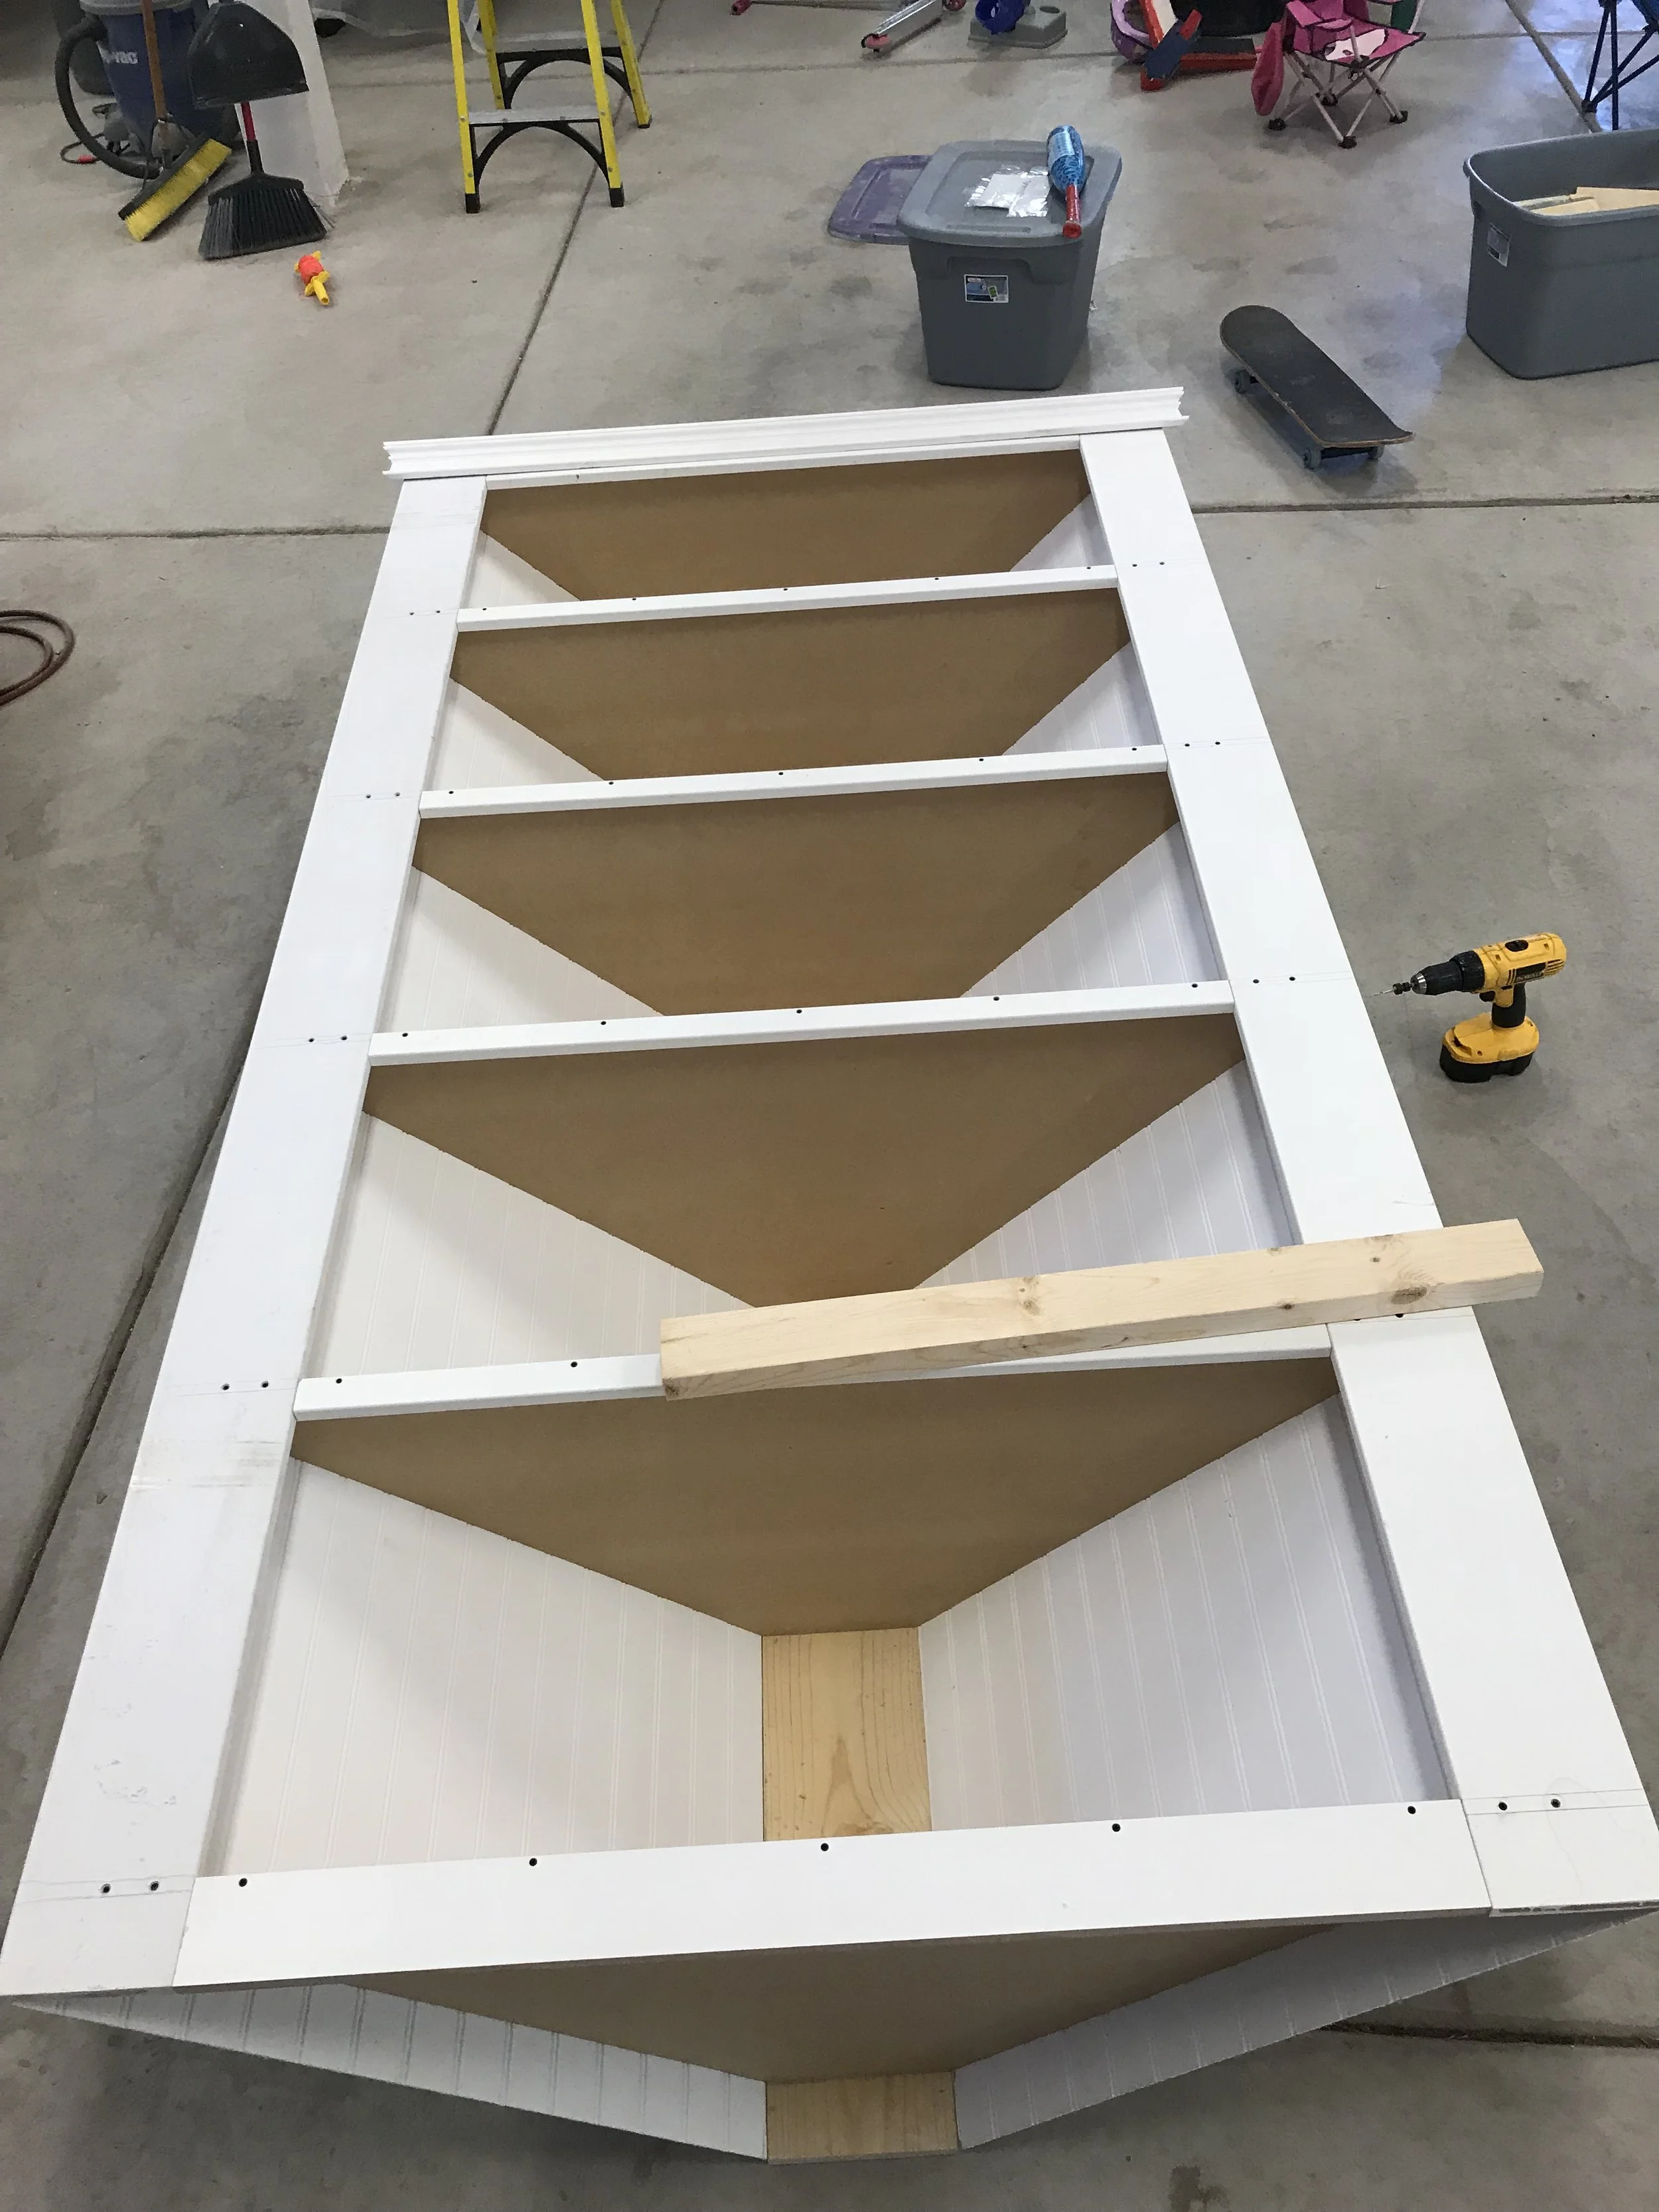
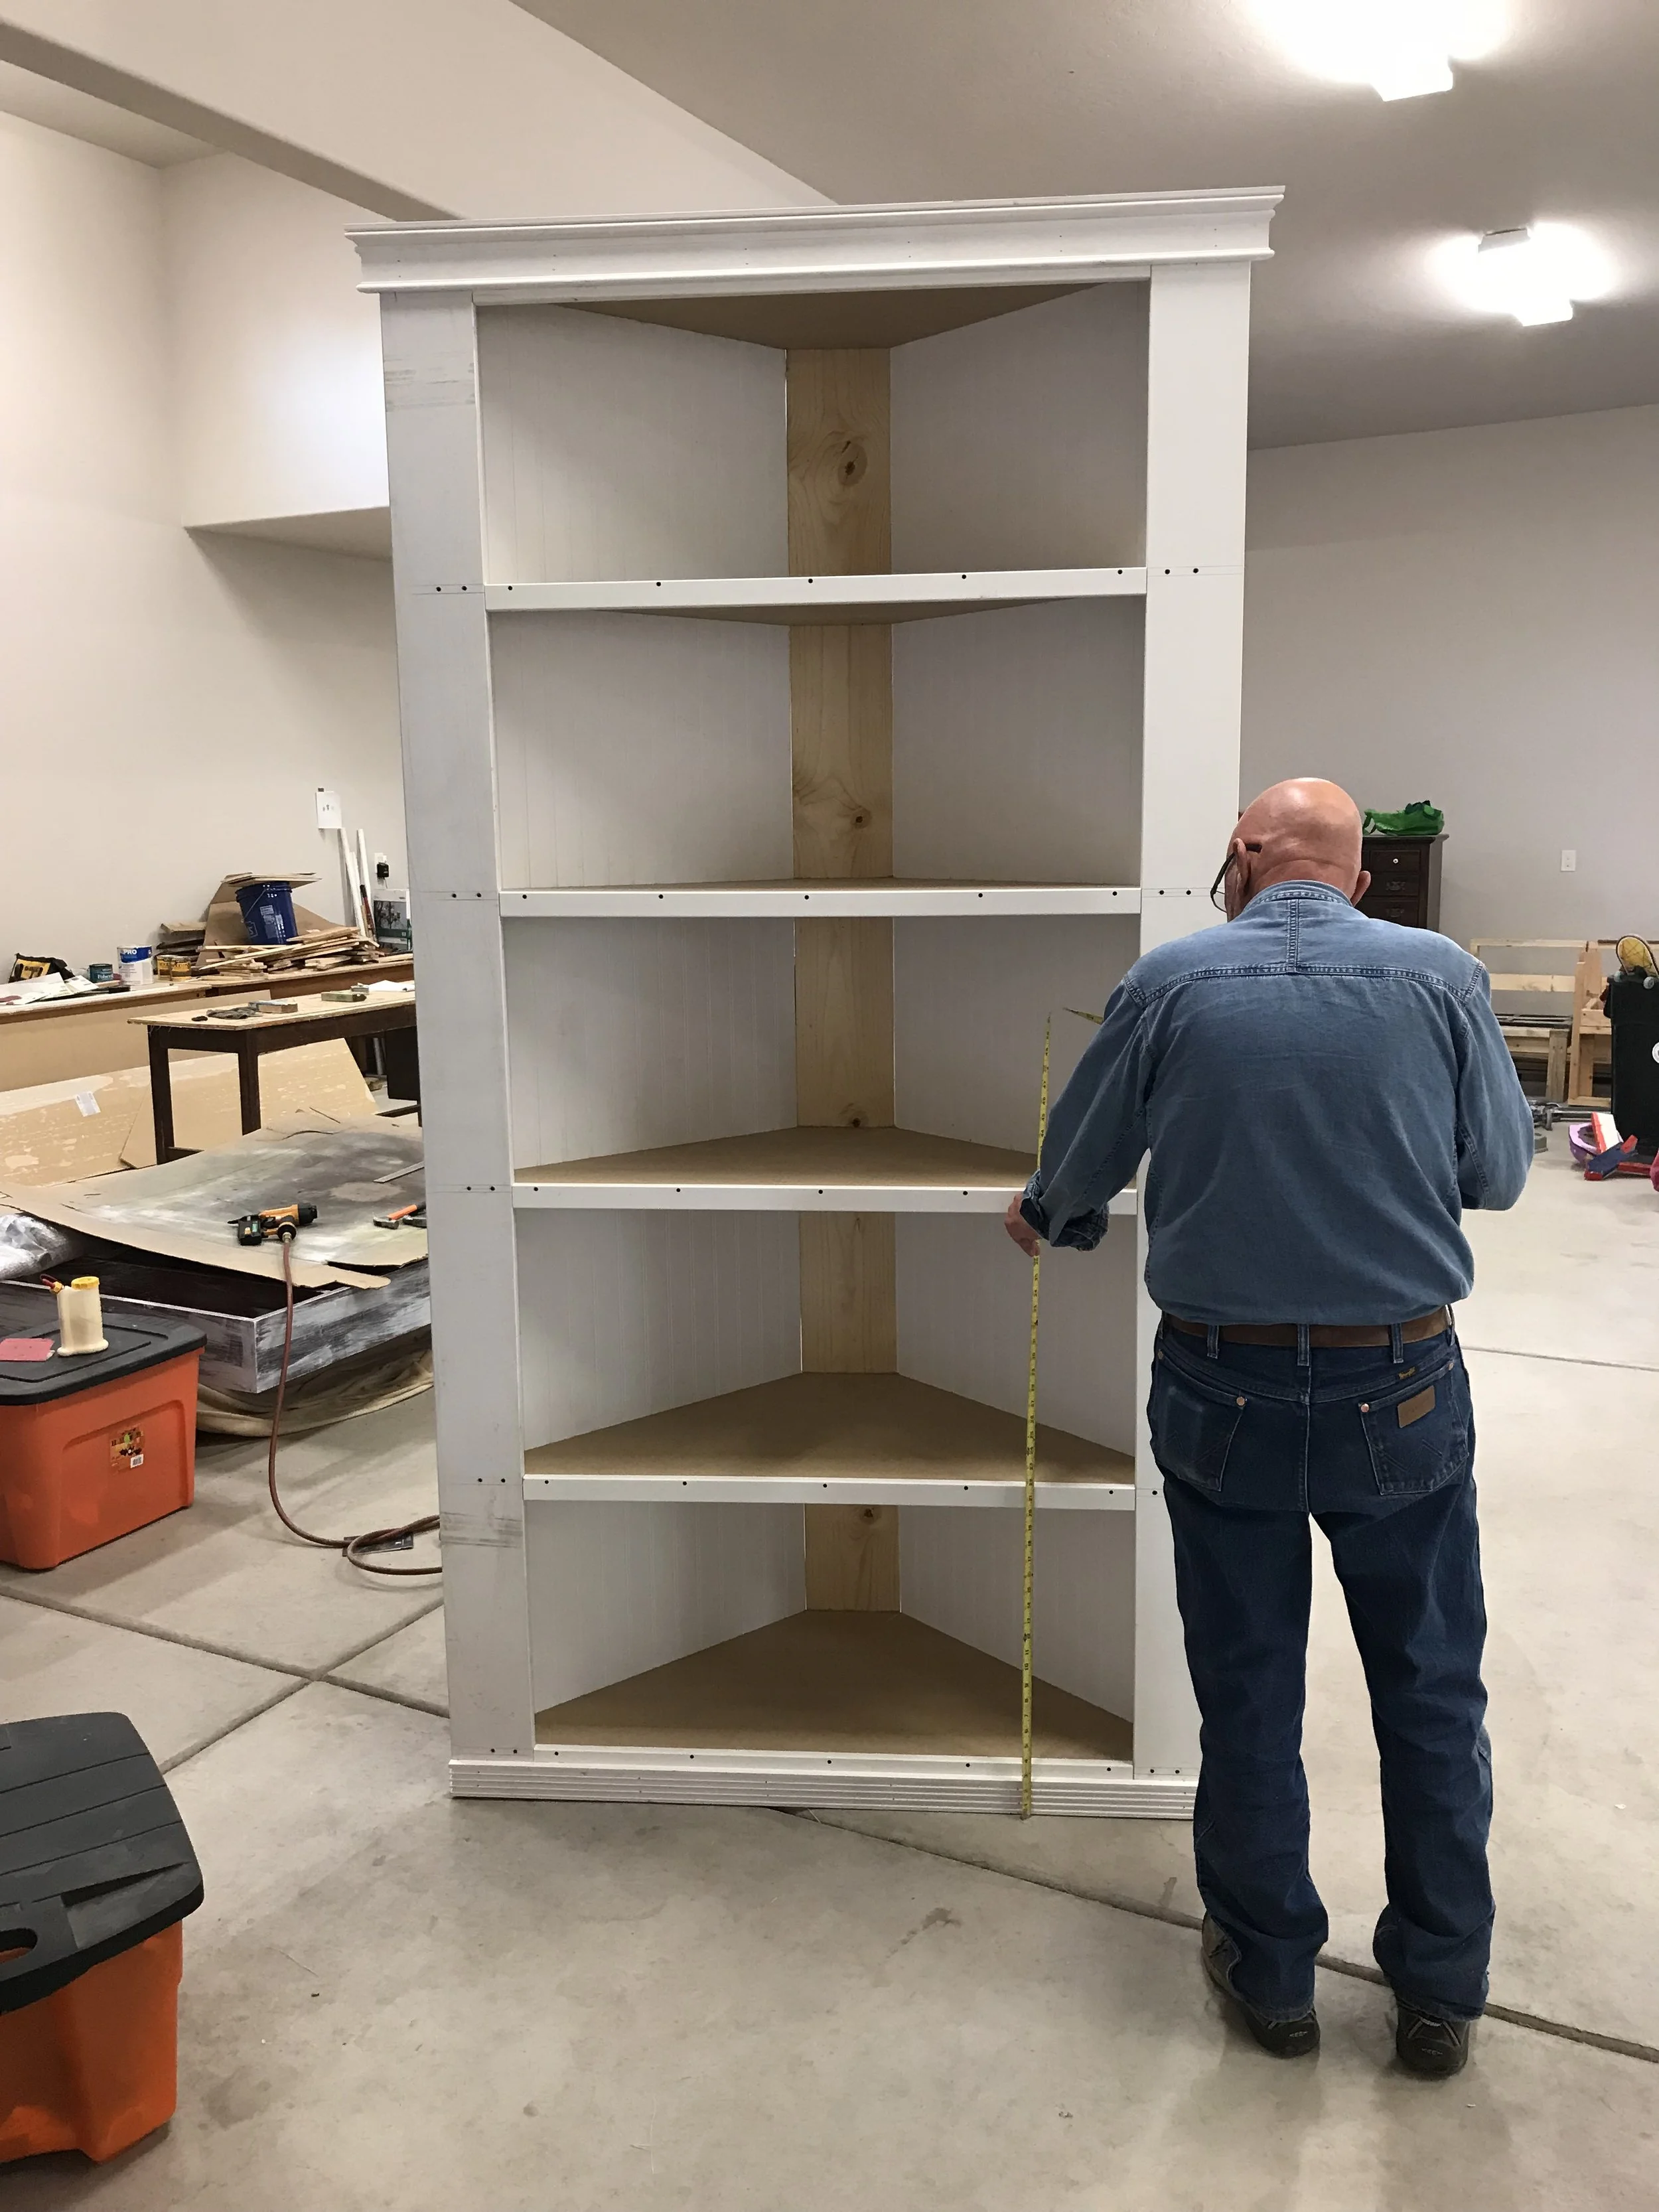
We carefully rolled "The Boat", as the kids nicknamed it, over onto the back board. We laid out the 2 - 1 x 6 x 8 (MDF) on the edges of the the shelves and glued and screwed them in with the trim screws. Once the side trim pieces where in, it was time to do the trim for the front of the shelves. We measured the width of the shelf fronts and cut the 1 x 2 (MDF) to fit each self. We cut and glued before we screwed them into place using the trim screws. We cut the molding to size and tacked it on with tack nails and some glue as well. Time to stand the monster up and get working on the doors.
Doors
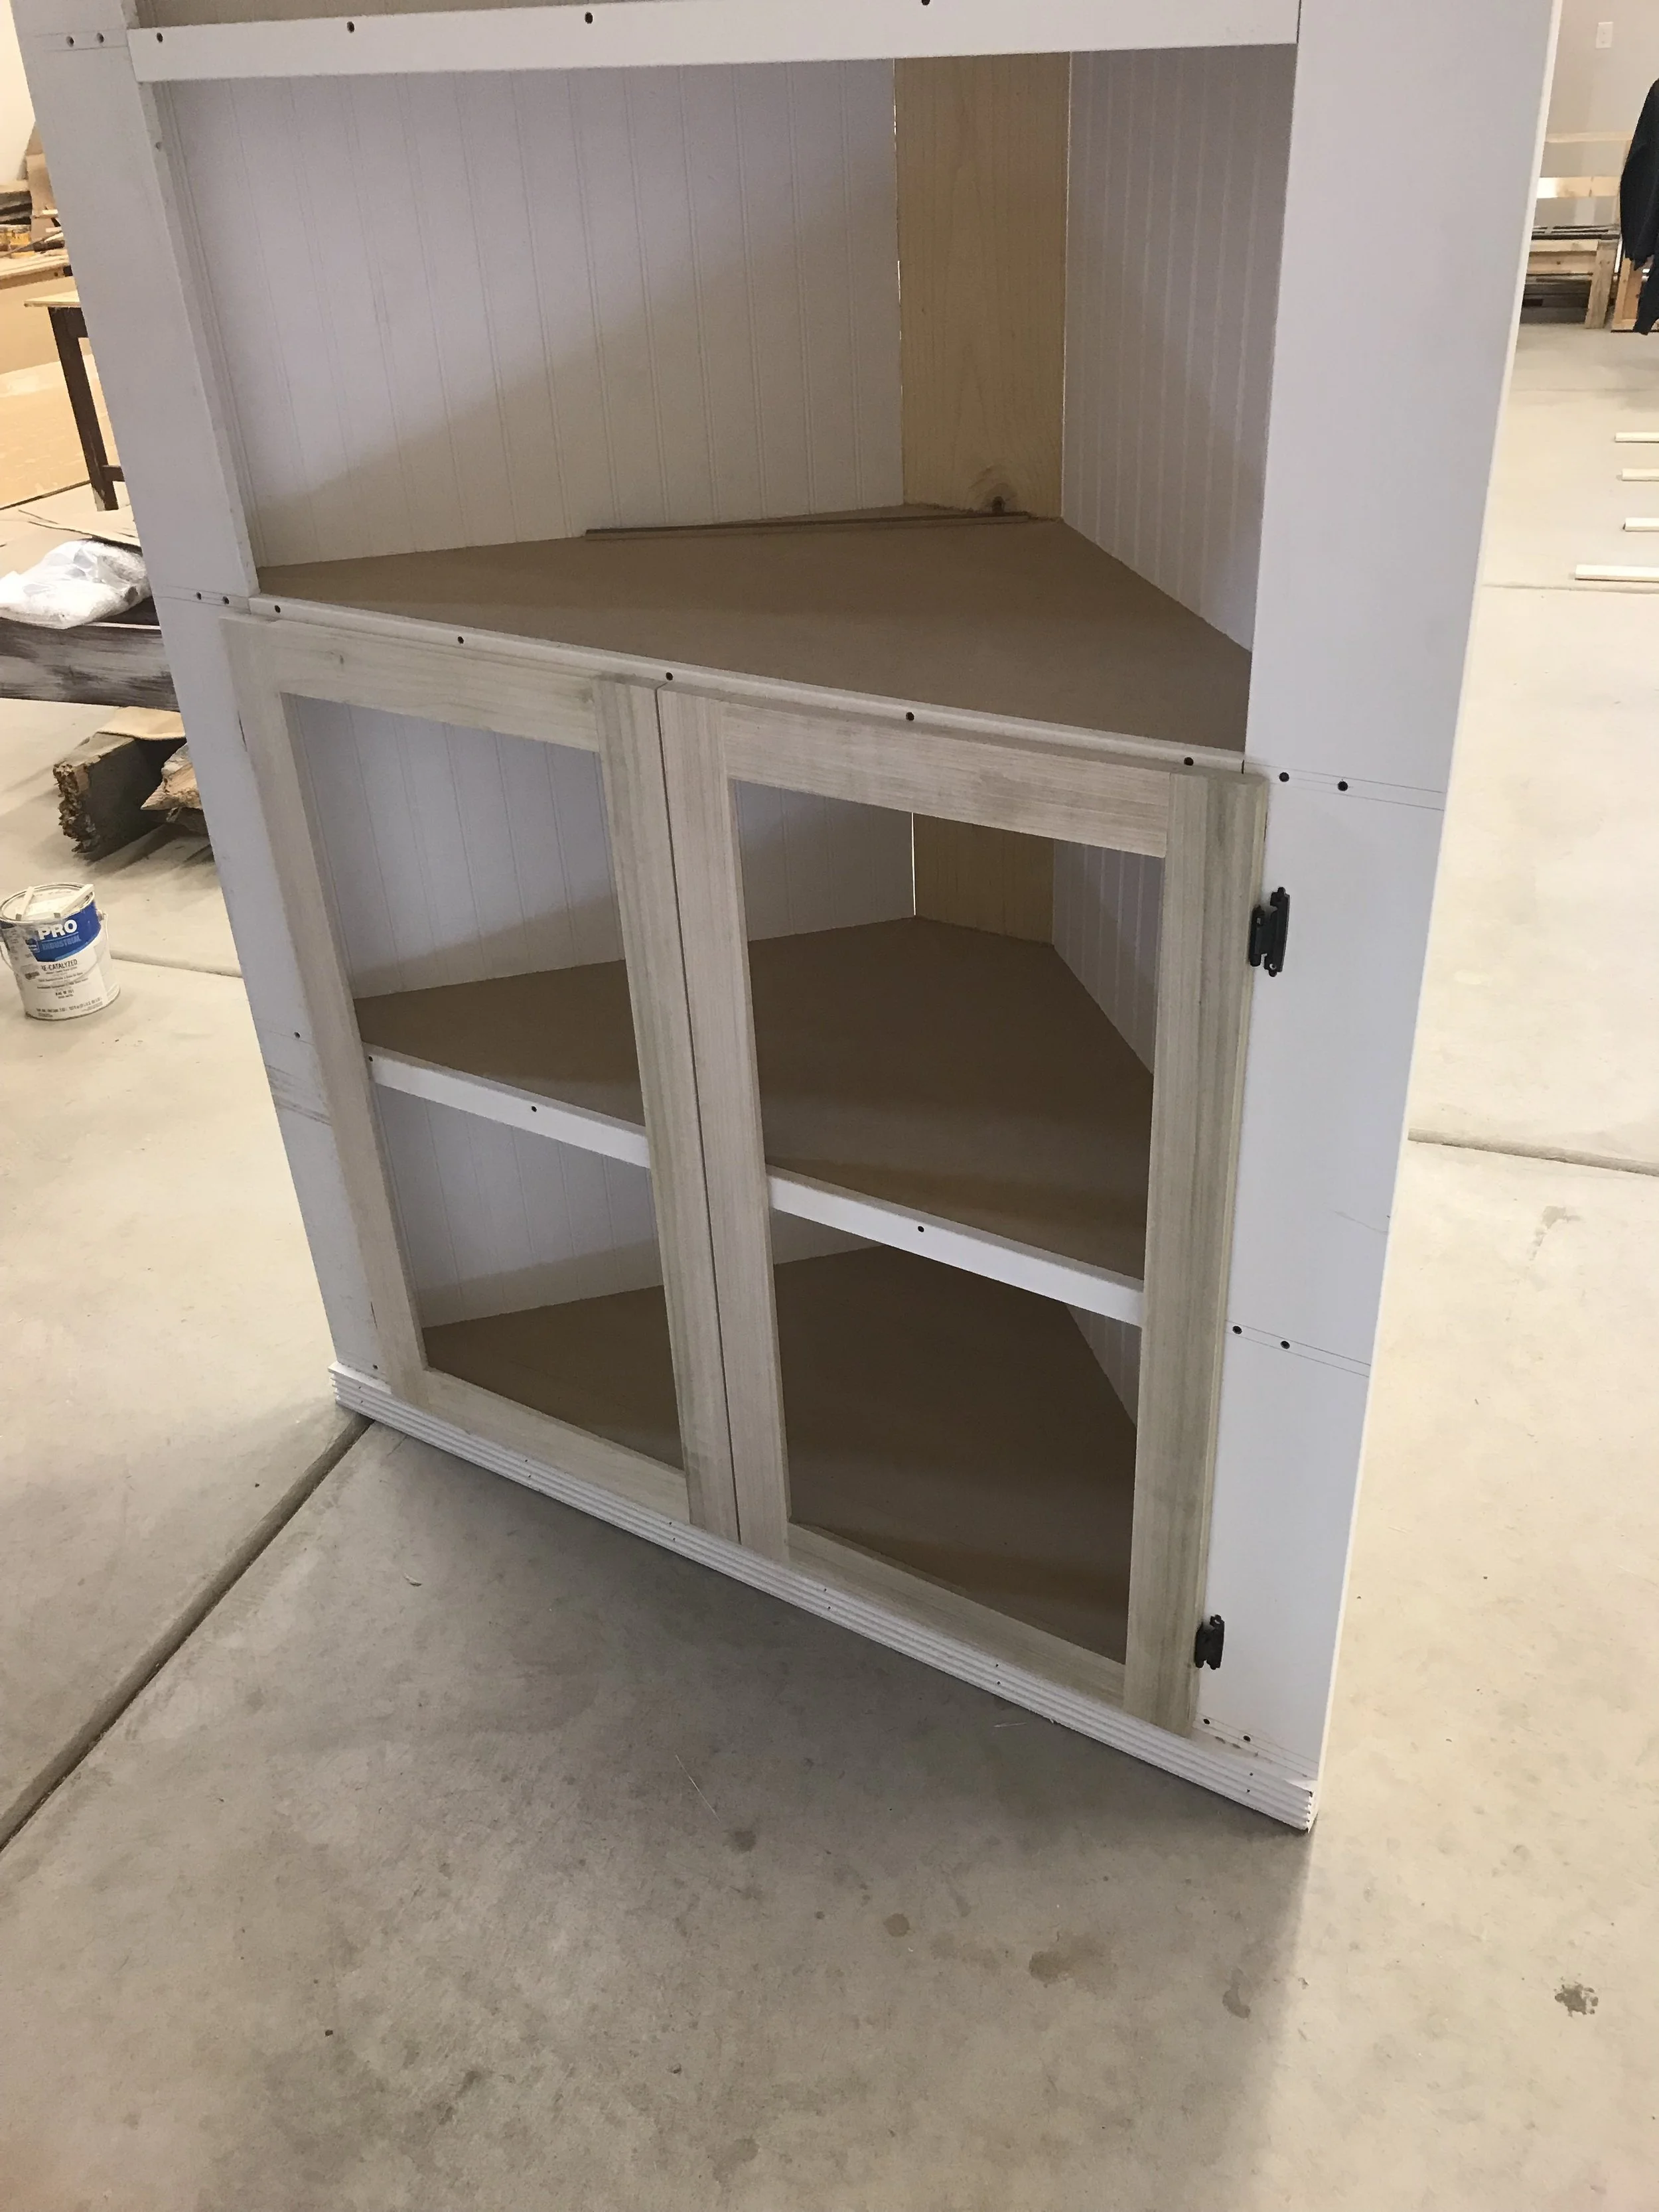
We just wanted doors on the bottom of the cabinet but you can add any size, anywhere, or even no doors to get the look you are going for. For our doors we needed 4 pieces of the 1 x 3 cut to 15 inches and 4 pieces cut to 37.5 inches. Using the Kreg Jig we drilled 2 pocket holes on each end of the 15 inch pieces. We then glued and clamped a 15 inch piece onto the 37.5 inch piece so that the corner was square and screwed the 2 pieces together using 1 1/4 inch Kreg screws. We repeated the process until each door was completed. We then attached the hinges, we made sure not to completely tighten the screws because we wanted to make sure when we put them on for good they would be nice and snug and not loose. Then we placed them on the cabinet to mark for the pilot holes. With small pilot holes drilled in the cabinet we attached the doors, again making sure not to tighten them completely.
With the construction of the corner cabinet complete it was then time for paint and the other finishing touches. Stay tuned for next weeks blog to learn how we completed the project. Hope I've inspired you to get out there and build that special piece but if you don't have the time to make your own, contact me for a custom piece and let me bring you that A Rustic Rose you've been looking for.
Thank you for spending time with me and until next time....
Addie